
12 Drawing Tips for Beginners - Digital Art
Drawing Tips for Beginners - Digital Art

Drawing digitally is one of the best ways to have total control over what goes on in your image.
You can flip the canvas to check for errors, Ctrl + Z to undo missteps, and even alter the drawing with a variety of transform tools.
BUT - it may build up a bit of a handicap when you don’t have those things at your disposal.
Still, many artists today work in the digital medium for those very reasons - flexibility, speed, and ease regarding revisions.
Below you’ll find a list of 12 tips to help you get the most out of your digital art program as a beginner. These tips were written with most digital art programs in mind. Whether you’re rocking Photoshop, Krita, Procreate, Gimp, Illustrator, or Clip Studio Paint, these tips should apply.
Use a Drawing Tablet with pressure sensitivity
Get comfortable with the basic tools
Avoid using too many brushes/pencils/etc…
Leverage layers
Don’t get too dependent on ctrl + z
Do simple exercises to warm up
Sketch a lot
Clean up your favorite sketches
Learn one new tool every few days
Write down and test shortcuts
Customize your workspace
Learn document and export settings
Let’s go into some more detail so you can cement these tips.
1. Use a Drawing Tablet with pressure sensitivity
When you get a drawing tablet, you’ll be able to plug it into your USB port.
There are drawing tablets where you’re drawing directly on the screen, and drawing tablets wherein you’re only drawing on a surface while looking at the monitor.
The more layers of pressure sensitivity a tablet has, the more you’ll be able to add nuance and subtlety to your work with ease.
There are many tablet brands on the market - Wacom, Huion, XP-Pen, iPad, etc…
Since this isn’t a post about which tablet you should get, you can spend some time doing research if you don’t have one already. The main point is that you’re going to want to use a tablet, and that it should have pressure sensitivity to augment your workflow.
2. Get comfortable with the basic tools
Tools are the many little squares and menus that are designedly nestled in whatever program you happen to be using. Usually there are only a few you need to concern yourself with for the purposes of actually drawing and erasing.
When you open your digital art program for the first few times, it pays to spend a good chunk of your energy exploring the tools. Seeing what hotkey activates them, what they do, and how they feel.
Think about how you can implement them into your process or what situation would warrant switching to these tools.
Mostly, you’ll likely be using a drawing tool, an erasing tool, a selection tool, and a move/transform tool. Those are the bread and butter of digital art, so make sure that you prioritize learning how those operate, as they’ll make your life as an artist much easier.
3. Avoid using too many brushes, pencils, etc…
This one is ultimately about simplicity. Some artists have the tendency to spread themselves quite thin over a large array of brushes and tools. They hop onto the next one before ever growing comfortable with the previous one. It’s not the best strategy for learning, and certainly not the best strategy for gaining the consistent results necessary to hearten yourself to continue learning.
So stick with the basic two or three the program offers. Or if you do download and add additional brushes/tools, pick one or two from that pack and stick with them. Make sure they’re very utilitarian and good for a variety of purposes, and not just for special-use cases.
4. Leverage layers
Layers are one of the best reasons to go digital as an artist. They allow you the freedom to sketch, refine, and test.
Learning the layer menu in whatever are program you’re teaching yourself is crucial. Learn how to drag them around, turn them on an off, merge them, rearrange them, and so on. A mastery of the layer menu will allow you to augment your process, and make your workflows much more efficient.
5. Don’t get too dependent on ctrl + z
Or Cmd+Z For your Mac users.
This one is pretty simple. If your fingers are constantly on that shortcut, you might be developing a dependency. That dependency on the “undo” function can harm your output, learning, and create crutches you’ll have to free yourself from later.
While it is a potent tool or making sure you don’t destroy your work, make sure you don’t get so addicted to it that you’re unable to finish your work. If you’re always trying to get the “perfect line” or being overly meticulous for the sake of perfection, you’ll advance slower than those who own their mistakes and fix them in other ways.
6. Do simple exercises to warm up.
Draw circles. Elipses. Squares. Make congruent marks all across the page. Get a feel for drawing straight lines. All of these exercises help you to not only temper your drawing ability, but they’ll get you used to your digital medium. 15 minutes of focused exercises is all you need before you begin sketching.
Here’s a video I made a while back showcasing some drawing exercises.
7. Sketch a lot
Get comfortable. Feel like you can be free inside of the program. It’s terribly hard to be overly-concerned with making mistakes, or just getting hung up in general.
Yes, the other side of the coin is making very sloppy work, but if you’re rushing things you can always slow down a bit.
The key here is balance. Sketch as much as you can, and make it a habit. Aim for 6 25-minute sketching sessions daily, with 5-10 minute breaks in between if you’re doing them consecutively.
After you wrack up those minutes, the program, your tablet, and the tools will start to feel like home to you.
8.Clean up your favorite sketches
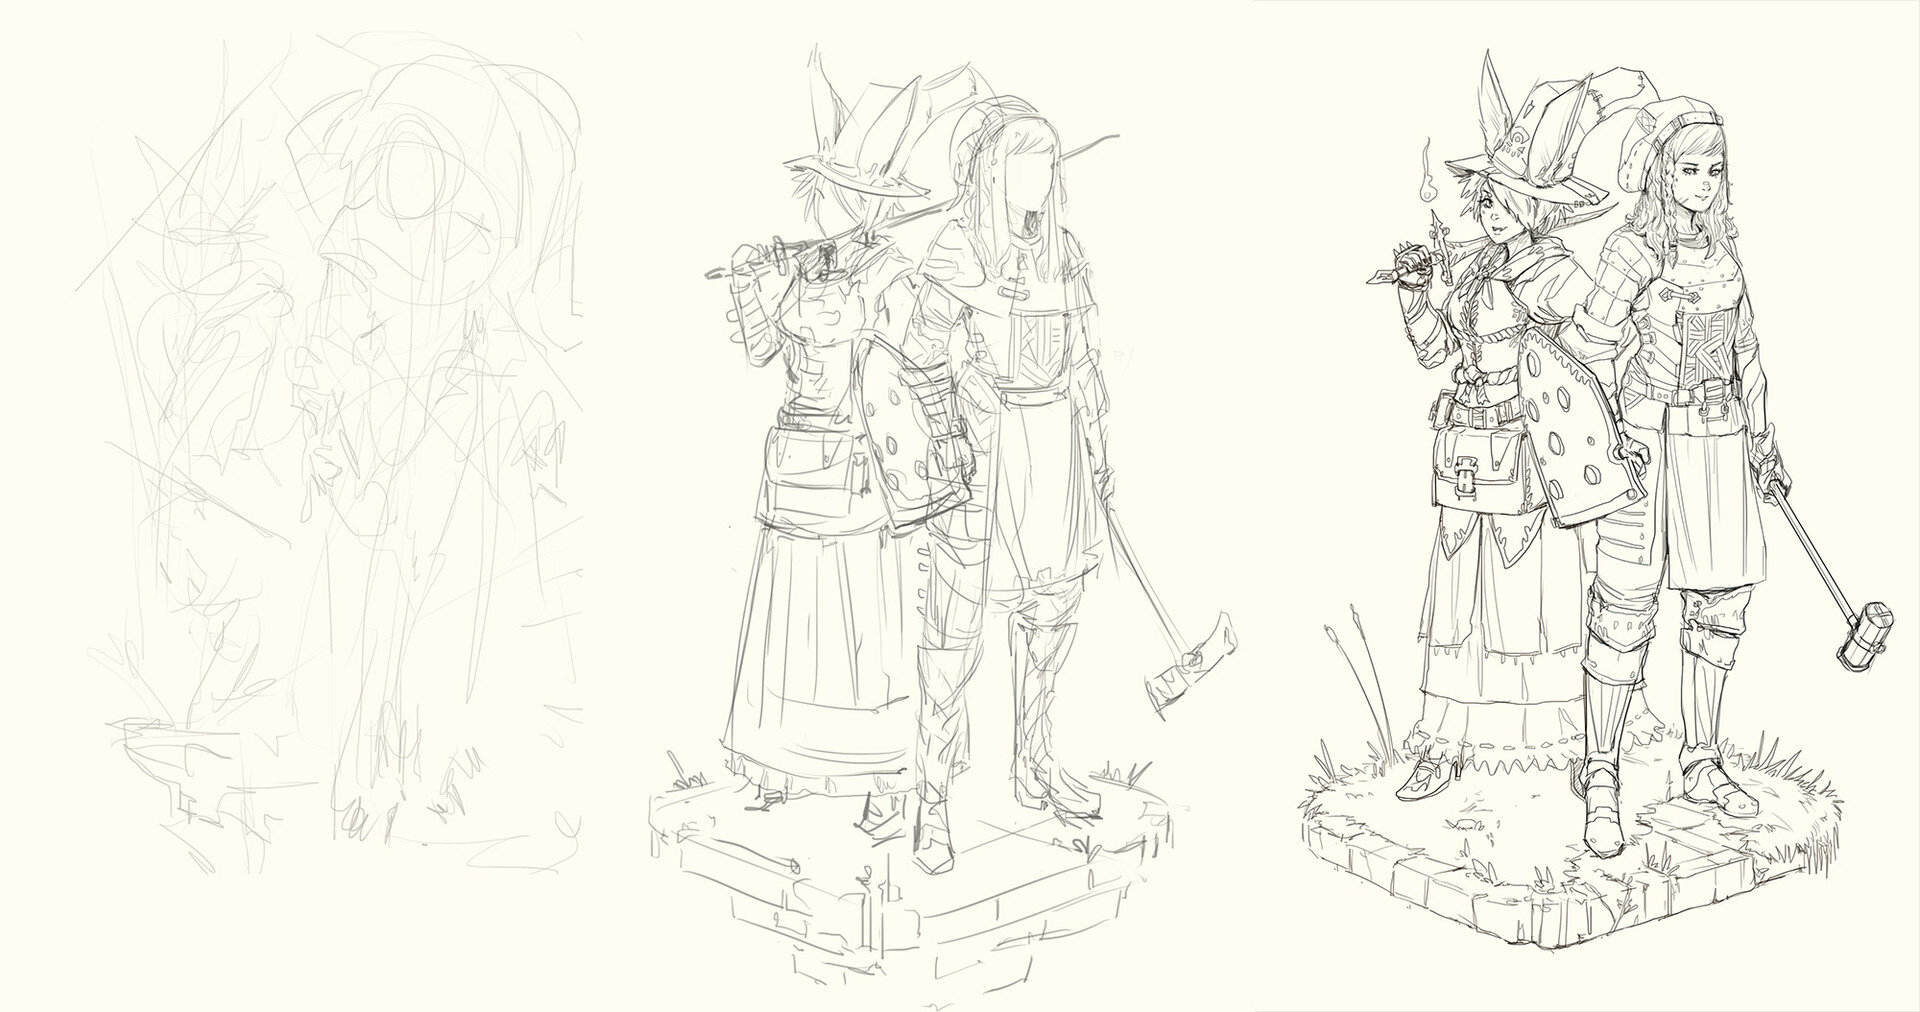
Save your work, of course (this is cmd or ctrl + S in most programs.) And when you’ve amassed 10-20 works, pick one or two to clean up. This means using the eraser to refine your lines. It means lowering the opacity on the sketch layer, making a layer above it, and trying to draw more accurately and clearly.
This will ensure that you’re refining both your work an your process, as well as turning out work consistently.
9. Learn one new tool every few days
Make a mental note to work with a new, utilizable tool from your program every few days. Implement it into your sketching sessions or your process. It will ensure that you’re opening up new creative possibilities, as well as growing more proficient in your program of choice.
Sure, some tools aren’t very general-use, and only have a lot of special-case application. In that case, always pick a tool that has more purpose, and gradually work your way to the more specialized tools instead.
10. Write down and test shortcuts
Shortcuts are things like cmd + z or ctrl + x that have specific uses attached to them. These hot keys will permit you to speed up certain things you’d usually have to reach into a menu for.
most of the time, you’ll be able to see what hotkey or shortcut performs which task by hovering over a tool, or scrolling through menus.
Spending time in the program and exploring those aforementioned things will surely help you to pick which functions you’d like to use.
In any case, it’s best to write them down on flash cards, or keep them handy so you can memorize them. And easy way to integrate them into your workflow easier is: “See, hear, Say, Do.”
11. Customize your workspace
Every artist has different needs regarding their workspace. If you’ve tested multiple programs, you know that there are always similarities and difference in every program you encounter. I highly recommend you stick with one program for quite a while when beginning, and customize it to suit your preferred way of working.
Not all programs are created equal in this capacity. Some will let you customize quite a bit, while others will ensure that you’ve only for a few pixel of wiggle room to modify the out-of-the-box User Interface.
At any rate, a few good rules of thumb are:
Close all the menus and boxes that you don’t or won’t use.
Open and slot the ones you find yourself using the most often.
Save your new workspace as the default workspace - this will vary from program to program, but if you don’t save your hard work, you’ll have to waste precious time setting up your preferred workspace each time you open the program.
12. Learn document and export settings
Whenever you open a new document, there will be a bevy of document settings that pop up for your to alter.
You’ll want to set yourself up for success here, so be sure to:
Increase the DPI to at least 200
Make sure your canvas is no smaller than 2000px on the shortest side.
Keep your color mode RBG or CMYK
Leave most of the other settings alone if you’re not doing something specific with the.
As for exporting your artwork - a simple JPEG will do fine. PNG is good too, but higher in file size.
If you’re working at a really high resolution, you can lower the quality to 80% and scale down the image before exporting to reduce bloated file size. Things that are too heavy as far as file size is concerned can make the difference between someone waiting for your image to load or simply scrolling by it.
It also makes it easier to send to friends or upload.
This isn’t an exhaustive list of all the ways you can alter a document and export it, but they are quite sufficient for making sure you can get a workable canvas, as well as a solid file export.
Summary:
These tips will serve you well, even if you only apply one or two consistently. However, just taking the time to revisit this post and try the others until they become routine will augment your abilities more so over time.
Digital art is one of the best mediums to get into, however it requires just as much discipline and commitment as traditional art. There are those out there who don’t see Digital Art as a medium that’s comparable, but the world keep turning, and more artists are turning to digital mediums daily.
Either way, you can use digital art programs to augment your traditional work if you don’t want to go full digital. In fact, it’s smart to always keep a sketchbook.
At any rate, keep drawing, creating, and ascending in skill. That way you can look back after see the hard work paying off. It helps to have tips to guide you, but action is integral to the process.
Free Drawing Lessons:
Interested in a boost to your drawing abilities? Sign up below and you can gain completely free access to 6 lessons to help you gain your footing, and develop good drawing skill and habits.
Lastly, if you found this helpful, please hit one of the social sharing buttons below!